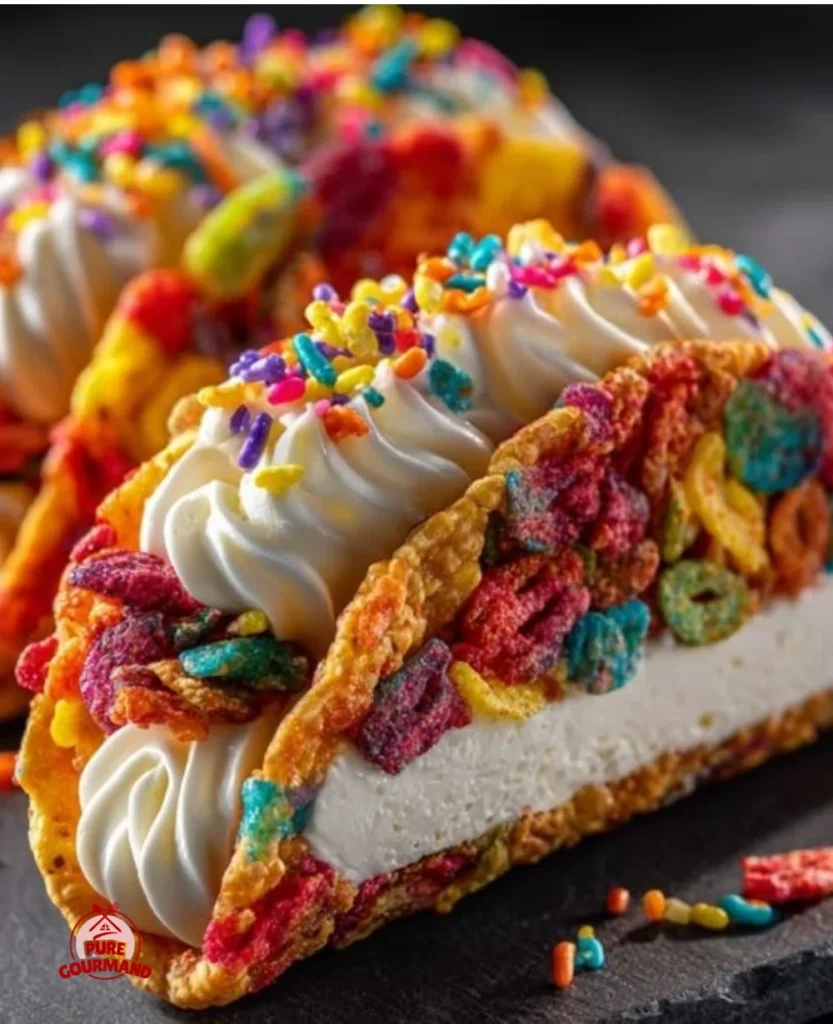
There’s something magical about combining fun and nostalgia in the kitchen. As a child, my favorite mornings often started with a colorful bowl of Fruity Pebbles cereal—a delightful blast of fruity flavors right at the breakfast table! Fast forward to adulthood, and I realized I could channel those whimsy-filled mornings into an exciting dessert. That’s how my Fruity Pebbles Cheesecake Tacos were born—an ultimate no-bake treat that’s perfect for any occasion and guaranteed to make you smile. Picture this: crunchy taco shells filled with a creamy cheesecake filling, all adorned with that iconic fruity crunch. It’s a playful twist on dessert that brings together the best of both worlds. So, let’s dive into this sweet adventure together!
Recipe Timing
- Prep Duration: 20 minutes
- Active Cooking: 10 minutes
- Total Duration: 30 minutes (plus chilling time)
- Portion Size: Serves 8
- Complexity: Simple
Nutritional Recipe
- Calories per portion: Approximately 340
- Protein: 4 grams per serving
- Carbs: 37 grams per serving
- Fats: 21 grams per serving
- Fiber: 0 grams per serving
- Sugars: 27 grams per serving
- Sodium: 150 mg per serving
Why You’ll Love This Fruity Pebbles Cheesecake Tacos (The Ultimate No-Bake Treat!)
These Fruity Pebbles Cheesecake Tacos are not just a feast for the eyes; they burst with flavor and are delightfully easy to make. Imagine sunny flavors dancing in every bite, with creamy textures meeting crunchy shells. Plus, they’re a hit at parties, bringing back childhood memories while satisfying a sweet tooth. And let’s not forget—they require no baking! With minimal effort, you’ll impress friends and family alike.
The Complete Cooking Journey
Creating these delightful tacos is a breeze from start to finish. You’ll be melting chocolate, whipping up a creamy filling, and assembling everything into gorgeous dessert tacos that look as fun as they taste. Each step pairs together perfectly, making you feel like a kid again as you make something truly special.
Ingredients:
- 8 Stand ‘N Stuff Taco Shells
- 10 oz White Melting Wafers
- 3 cups Fruity Pebbles Cereal (divided)
- 8 oz Cream Cheese (full-fat, softened)
- 1 cup Powdered Sugar
- 1 cup Heavy Whipping Cream (cold)
- 1 tsp Vanilla Extract
- 1/2 cup Fruity Pebbles Cereal (lightly crushed)
Method:
Step 1: Create the Crispy Taco Shells
Begin by melting the white melting wafers in a microwave-safe bowl. Heat in 30-second intervals, stirring between each interval until smooth. Dip each Stand ‘N Stuff Taco Shell in the melted chocolate, coating the top edges to create a delicious, crispy shell. Then, sprinkle the lightly crushed Fruity Pebbles on the chocolate while it’s still wet. Place them on a baking sheet lined with parchment paper and allow them to set at room temperature for about 10-15 minutes.
Step 2: Whip Up the Creamy Cheesecake Filling
In a mixing bowl, combine the softened cream cheese and powdered sugar. Blend until smooth. In a separate bowl, whip the cold heavy whipping cream until stiff peaks form. Gently fold the whipped cream into the cream cheese mixture. Finally, add in the vanilla extract and 2 1/2 cups of fruity pebbles for that perfect blend of sweetness and crunch.
Step 3: Assemble Your Dessert Tacos
Now it’s time to fill those beautiful taco shells! Using a piping bag or a spoon, generously fill each taco shell with the creamy cheesecake filling. Top each filled taco with a sprinkle of the remaining Fruity Pebbles for an extra punch of color and flavor. You can also drizzle a bit of melted white chocolate on top for decoration, if desired.
Serving Suggestions & Pairings
These Fruity Pebbles Cheesecake Tacos shine on their own, but for a delightful treat, consider pairing them with a scoop of vanilla ice cream or fresh berries. You could even serve them alongside a cold glass of milk or a fruity smoothie for a refreshing combo that caters to your inner child!
Storage & Leftovers Guide
If you have any leftovers (which is rare but possible), store them in an airtight container in the refrigerator. They are best enjoyed within two days, as the taco shells may lose their crunch over time.
Kitchen Wisdom & Success Tips
- Tips for Perfect Taco Shells: Make sure your melted chocolate isn’t too hot when dipping the shells, or it may cause them to soften. Letting them cool slightly will help maintain their structure.
- Perfect Whipped Cream: Ensure your mixing bowl and beaters are chilled for perfectly whipped cream. It helps achieve those stiff peaks you need for a lovely filling.
Flavor Variations & Adaptations
While Fruity Pebbles are irresistibly fun, you can switch it up! Try using Cocoa Pebbles for a chocolate twist or even crushed Oreos for a cookies and cream flavor! The essence of this recipe lies in its versatility—don’t hesitate to mix and match according to your cravings.
Reader Questions & Solutions
- Can I use low-fat cream cheese? Yes, but the texture may be a bit less creamy. Full-fat cream cheese yields the best results!
- What if I can’t find white melting wafers? You can substitute with white chocolate chips, but make sure to melt them slowly to prevent burning.
- How can I make these dairy-free? Use dairy-free cream cheese, coconut cream, and non-dairy whipped topping for a delicious dairy-free version!
- Do I have to chill them? Yes, chilling allows the filling to set nicely and makes it easier to hold when serving.
- How can I prevent the shells from getting soggy? Fill the shells just before serving to maintain their crunchiness.
Wrapping Up
Making Fruity Pebbles Cheesecake Tacos isn’t just a delicious endeavor; it’s a chance to reconnect with your inner child and share joy in every bite. Whether it’s for a celebration or just a sweet treat to brighten your day, this recipe promises a fun-filled experience that you and your loved ones will treasure. So gather your ingredients and let’s get cooking—your fun, fruity adventure awaits!