why make this recipe
Making DIY scented aroma stones is a fun and simple way to bring natural fragrance into your home. These stones not only smell great but also add a lovely decorative touch to your space. You can choose your favorite essential oils, making each stone unique to your scent preferences. Plus, they are an eco-friendly option compared to synthetic air fresheners. Creating your own aroma stones can also be a rewarding craft activity to enjoy alone or with family and friends.
how to make DIY Scented Aroma Stones
Ingredients:
- 0.5 cup baking soda (the base of our stones)
- 0.25 cup cornstarch (helps bind and gives a smooth finish)
- 0.25 cup water (to create the dough)
- 2-3 drops essential oils (per stone, for scent e.g., lavender, eucalyptus, citrus)
- Mica powder (for color)
- Natural colorants (optional)
- Dried flowers (for color and decoration)
- Ribbon or twine (for hanging or gift bundles)
Directions:
Step 1: Create the Dough
In a saucepan over medium-low heat, combine baking soda, cornstarch, and water. Stir continuously until it thickens into a soft, play-dough-like consistency. Remove from heat and let it cool completely.
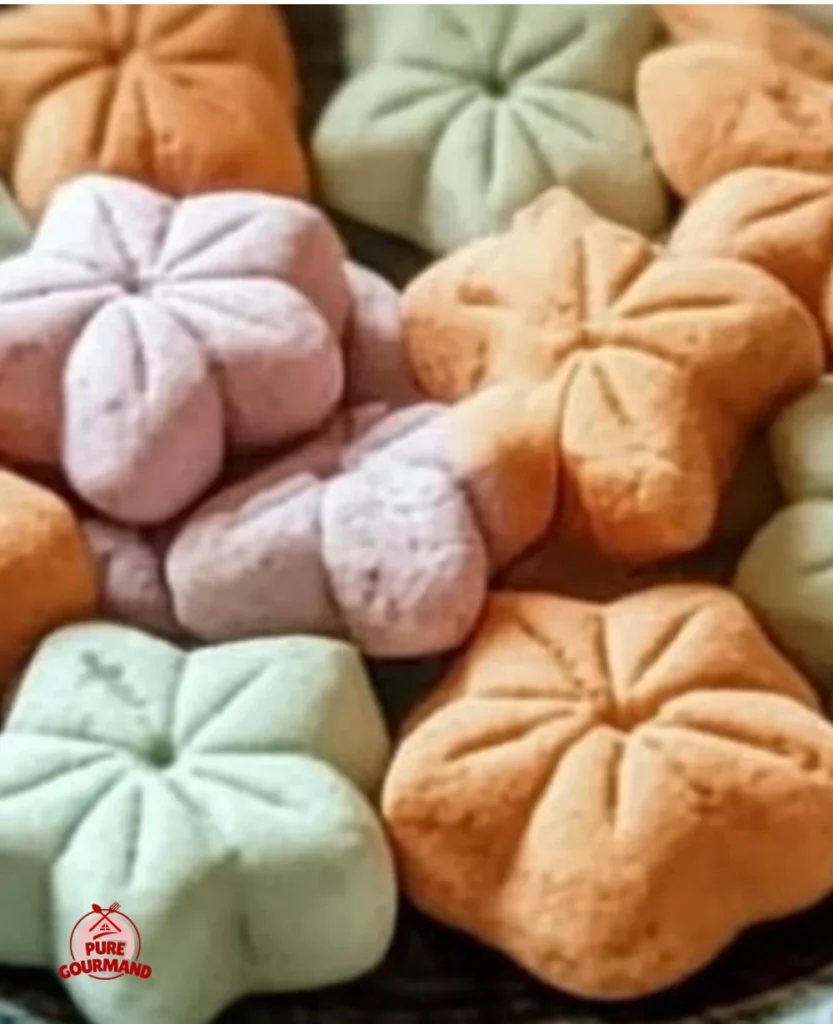
Step 2: Shape Your Stones
Once cooled, knead the mixture until it’s pliable. If you want to use colorants, knead them in at this stage. Press the dough into silicone molds or roll it out to about 1/4-inch thickness and cut shapes using cookie cutters. Smooth any rough edges with a damp finger.
Step 3: Let Them Dry
Place the shaped stones on a drying rack or parchment paper. Allow them to air dry for 24 to 48 hours, flipping them halfway through for even drying.
Step 4: Add the Aroma!
When the stones are completely dry and hard, turn them over and add 2 to 3 drops of your chosen essential oil to the back of each stone.
Step 5: Display and Enjoy
Now, you can place the scented aroma stones in a dish, pouch, or drawer. To keep the scent fresh, add a drop or two of essential oil every 1-2 weeks.
how to serve DIY Scented Aroma Stones
These aroma stones can be served simply by displaying them in beautiful dishes or jars around your home. You can also give them as thoughtful gifts, paired with twine or ribbon for a more personalized touch. Place them in your closet, drawers, or vehicle for a fragrant experience wherever you go.
how to store DIY Scented Aroma Stones
Store the aroma stones in a cool, dry place away from direct sunlight. If you want to keep their scent longer, place them in an airtight container when not in use. Just remember to refresh the scent regularly with essential oils.
tips to make DIY Scented Aroma Stones
- Experiment with different essential oils to create your favorite scent combinations.
- Use silicone molds to create different shapes and sizes of stones.
- Consider adding glitter or dried flowers for extra beauty.
- Make a larger batch to create gift bundles for friends and family.
variation
You can customize the aroma stones by using different types of natural colorants or even adding small beads or charms into the dough for decoration. Additionally, try using different molds to shape stones that fit the seasons, like hearts for Valentine’s Day or leaves for fall.
FAQs
Q: Can I use food coloring instead of mica powder?
A: Yes, you can use food coloring, but use it sparingly as it may change the texture of the dough.
Q: How long will the scent last?
A: The scent can last several weeks, but you may need to refresh it every 1-2 weeks with essential oil.
Q: What should I do if my stones are too crumbly?
A: If the stones are crumbly, you may need to add a little extra water to the mixture to help bind it better before shaping.
Making DIY scented aroma stones is an easy and enjoyable project that brightens your home with lovely fragrances while allowing you to express your creativity. Get mixing and let your home smell amazing!