why make this recipe
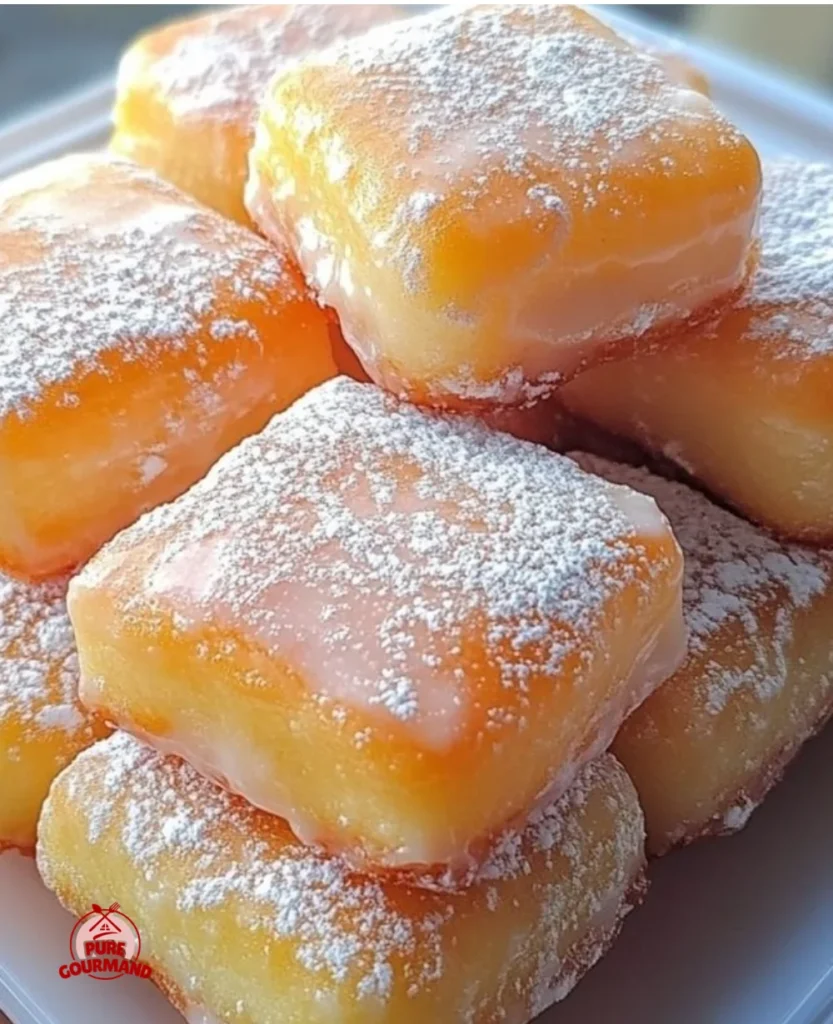
Dreamy Buttermilk Beignets are the perfect little fried delights that bring joy with each bite. They are soft, fluffy, and lightly sweetened, making them an ideal treat for breakfast, dessert, or even a snack. Imagine sinking your teeth into a warm beignet dusted with powdered sugar while enjoying a cup of coffee or tea. Plus, making them at home is easier than you might think!
how to make Dreamy Buttermilk Beignets
Ingredients :
- 2 cups all-purpose flour (The backbone of our fluffy treats.)
- ½ cup granulated sugar (For just the right amount of sweetness.)
- 1 tablespoon baking powder (This is what gives our beignets their amazing lift!)
- ½ teaspoon baking soda (Works with the buttermilk for extra fluffiness.)
- ½ teaspoon salt (Balances all the sweet flavors.)
- ½ teaspoon ground nutmeg (A hint of warmth and classic beignet flavor.)
- ½ cup buttermilk
- 2 large eggs (For richness and binding the dough.)
- 1 teaspoon vanilla extract (Because everything is better with a touch of vanilla.)
- ¼ cup unsalted butter (Adds a lovely richness to the batter.)
- Vegetable oil (for frying. You’ll need enough to fill your pot about 2-3 inches deep. Canola or peanut oil also work great.)
- Powdered sugar (for dusting. The essential, snowy topping!)
Directions :
Step 1: Mix the Dry Ingredients: In a big mixing bowl, grab a whisk and combine your flour, sugar, baking powder, baking soda, salt, and nutmeg. Give it a good whisk until everything is evenly distributed. This ensures no surprise pockets of baking powder!
Step 2: Mix the Wet Ingredients: In a separate, medium-sized bowl, whisk together the buttermilk, eggs, vanilla extract, and that lovely melted butter. You want this mixture to be nice and smooth. It’s almost like making a simple pancake batter, but for beignets!
Step 3: Combine Wet and Dry: Now, pour those wet ingredients into the bowl with your dry ingredients. Using a spatula or a wooden spoon, gently fold everything together until it’s just combined. Seriously, be gentle! Overmixing is the enemy of fluffy baked goods (and fried ones too!), so stop as soon as you don’t see any dry flour streaks. A few lumps are perfectly fine!
Step 4: Let the Batter Rest: Cover the bowl and let your beignet batter rest on the counter for about 10-15 minutes. This little rest allows the gluten to relax, which will make your beignets even more tender. While it rests, you can get your frying station ready.
Step 5: Heat the Oil: Pour your vegetable oil into a heavy-bottomed pot or a deep fryer. You want to heat it to 350°F (175°C). If you don’t have a thermometer, you can test it by dropping a tiny bit of batter into the oil. If it sizzles and floats to the top right away, it’s ready! Maintaining the correct temperature is key for perfectly fried beignets – not too greasy, not burnt!
Step 6: Fry the Beignets: Grab a couple of spoons. One spoon will hold your batter, and the other will help gently push the batter into the hot oil. Drop spoonfuls of the batter into the oil. Don’t overcrowd the pot – fry about 2-3 beignets at a time so the oil temperature stays consistent. They’ll puff up like little clouds!
Step 7: Cook to Golden Perfection: Let them fry for about 2-3 minutes per side. You’re looking for a beautiful golden-brown color. They cook pretty quickly, so keep an eye on them!
Step 8: Drain Excess Oil: Use a slotted spoon or a spider strainer to carefully lift the beignets out of the oil. Place them on a plate lined with paper towels to soak up any extra oil. This is a crucial step for that perfectly crisp, not greasy, finish.
Step 9: Continue Frying: Repeat steps 6-8 with the rest of your batter. Remember to check your oil temperature periodically and adjust the heat as needed.
Step 10: Dust with Powdered Sugar: This is the most satisfying part! While the beignets are still warm, place them in a bowl or on a plate and generously dust them with powdered sugar. The warmth of the beignets helps the sugar adhere beautifully.
Step 11: Serve and Enjoy!: Serve your warm, dreamy beignets immediately. They’re absolutely divine on their own, or you can serve them with a side of coffee or a fruity drink like our homemade watermelon lemonade.
how to serve Dreamy Buttermilk Beignets
To serve your Dreamy Buttermilk Beignets, present them in a beautiful bowl or on a festive plate. You can sprinkle a little more powdered sugar on top for an extra sweet touch. They pair perfectly with coffee, tea, or even a fresh fruit smoothie.
how to store Dreamy Buttermilk Beignets
If you happen to have any beignets leftover, store them in an airtight container at room temperature for up to 1 day. For longer storage, you can freeze them. Just place the cooled beignets in a freezer bag and keep them in the freezer for up to a month. When you’re ready to enjoy, reheat them in the oven for a few minutes.
tips to make Dreamy Buttermilk Beignets
- Don’t Overmix: Be careful not to overmix the batter. A few lumps are okay and will lead to fluffier beignets.
- Watch the Oil Temperature: Maintaining the right oil temperature is essential for the best fry. Use a thermometer if you have one.
- Fresh Ingredients: Make sure your baking powder and baking soda are fresh for the best rise.
variation
You can add different flavors to the batter, such as a pinch of cinnamon for a warm twist or citrus zest for a refreshing taste. You could also fill the beignets with fruit jams or chocolate before frying for an extra surprise!
FAQs
Can I make the batter ahead of time?
It’s best to use the batter right after resting. If you let it sit too long, it may not fry properly.
What if I don’t have buttermilk?
You can substitute buttermilk with regular milk by adding 1 tablespoon of vinegar or lemon juice to ½ cup of milk. Let it sit for 5 minutes before using.
Can beignets be reheated?
Yes! If you’d like to reheat leftover beignets, set your oven to 350°F (175°C) and warm them for about 5 minutes. They will taste fresh again!